In part 1 of this series, we will demystify how a container communicates with the host and vice versa.
Topics to be covered
- Isolating containers with network namespaces.
- Constituent networking elements like network interface, veth pair, and routing rules.
- Set up container networking from scratch using Linux commands.
Prerequisites
In this article, we are using the vagrant ubuntu/jammy64 virtual machine. Make sure you have the vagrant installed. Here is the link to the vagrant file to set up the VM.
To start the VM, go to the directory where you downloaded the vagrant file and then execute the below commands:
#To start the VM
vagrant up

#To SSH into the VM
vagrant ssh
Note: All the commands in the following articles are run with root privileges. Either you can add
sudobefore each command or switch to different a user with root privileges by runningsudo su
Isolating containers with network namespaces
Linux namespaces are one of the technologies that make up containers and allow process isolation. We will be using a network namespace to isolate the containers.
A network namespace is logically another copy of a network stack, with its routes, firewall rules, and network devices.
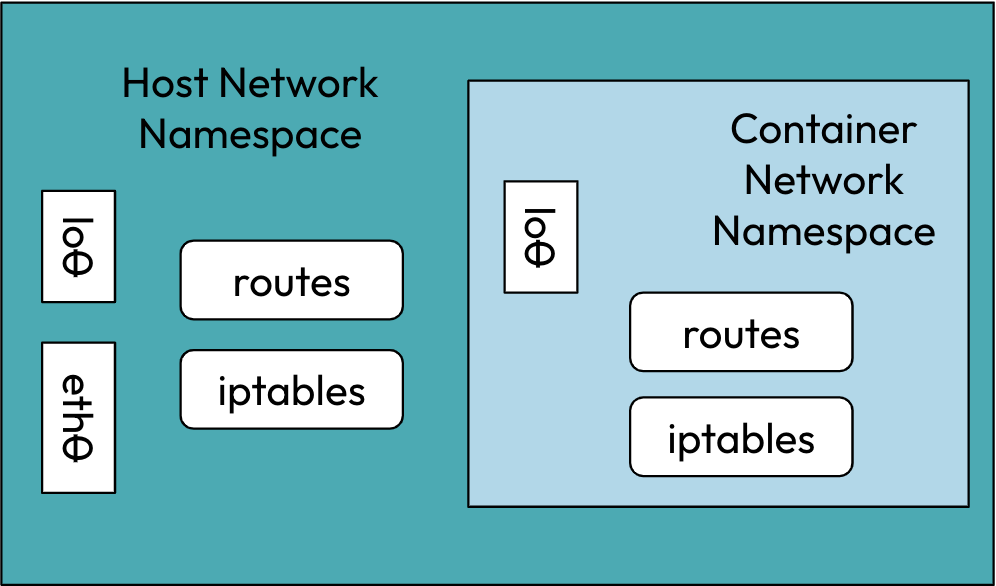
Instead of creating fully-isolated containers, we’d rather restrict the scope to only the network stack.
Container networking constituent elements
1. Network Interface
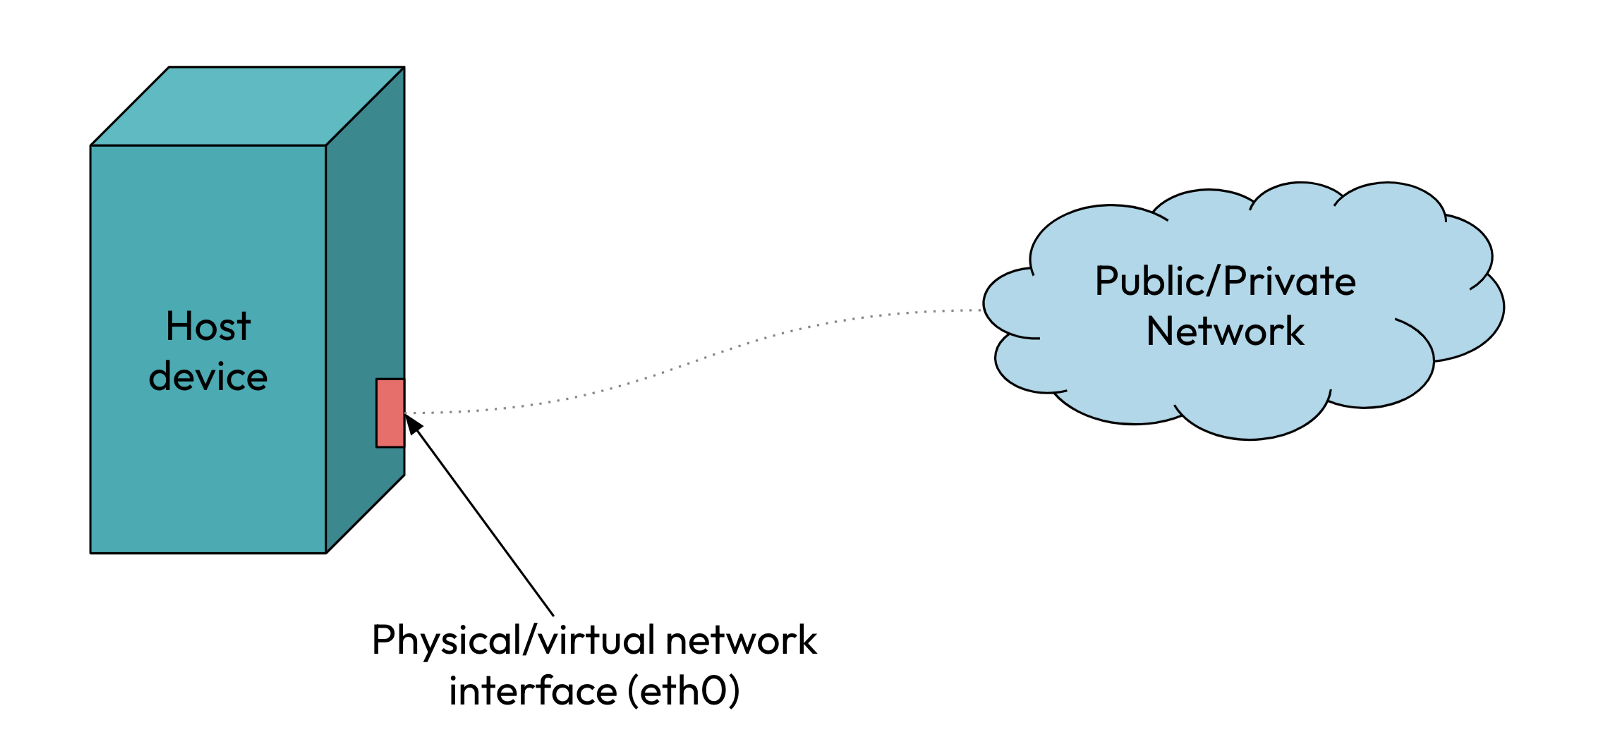 A network interface is the point of interconnection between a computer and a private or public network.
2. Virtual Ethernet Device (veth)
The veth devices are virtual ethernet devices. They can act as tunnels between network namespaces.
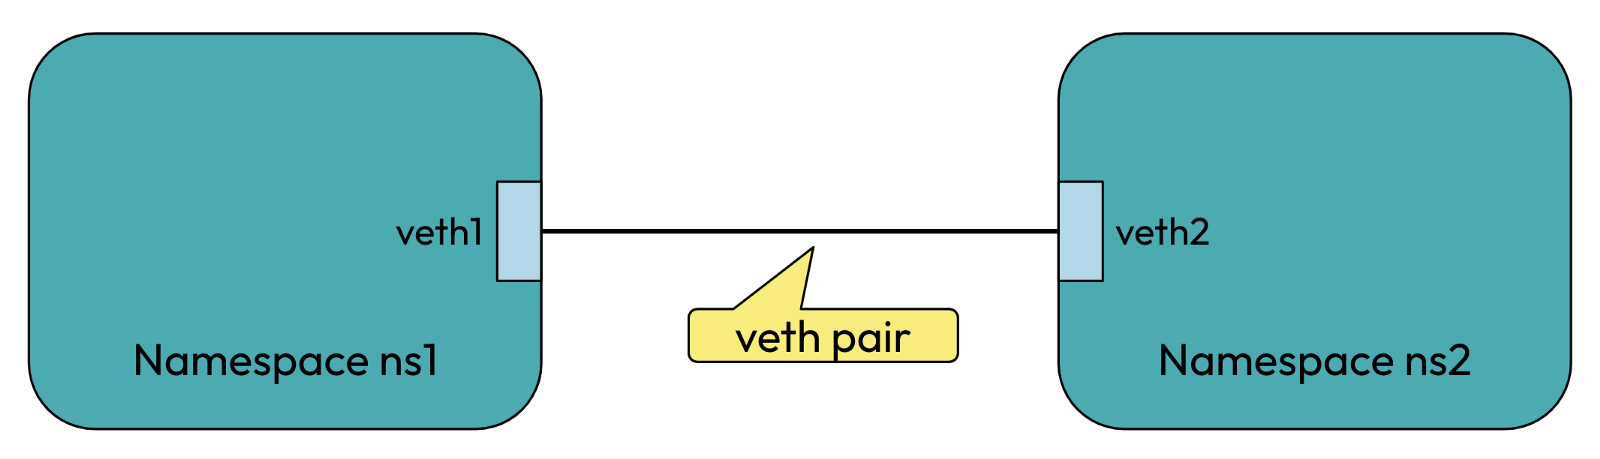 In the above, veth1 and veth2 are the names assigned to the two connected endpoints. Packets transmitted on one device in the pair are immediately
received on the other device. For eg, if we transmit packets from veth1, they will be immediately received on veth2 and vice versa thus allowing
communication between network namespaces ns1 and ns2.
In the above, veth1 and veth2 are the names assigned to the two connected endpoints. Packets transmitted on one device in the pair are immediately
received on the other device. For eg, if we transmit packets from veth1, they will be immediately received on veth2 and vice versa thus allowing
communication between network namespaces ns1 and ns2.
3. Routing Tables
Routing tables stores information on how packets are to be forwarded from one point to another.
 The entry in the above routing table means that any packet which is destined for the 102.26.67.0 network with a netmask of 255.255.255.0 has to
be transmitted via the gateway 10.0.0.2 and goes out through the interface eth0.
The entry in the above routing table means that any packet which is destined for the 102.26.67.0 network with a netmask of 255.255.255.0 has to
be transmitted via the gateway 10.0.0.2 and goes out through the interface eth0.
Let’s set up container networking from scratch with Linux commands
Hope you have set up the fresh VM and ssh into it ✌️.
-
To see the host interfaces and devices' IP addresses, run
ip addr
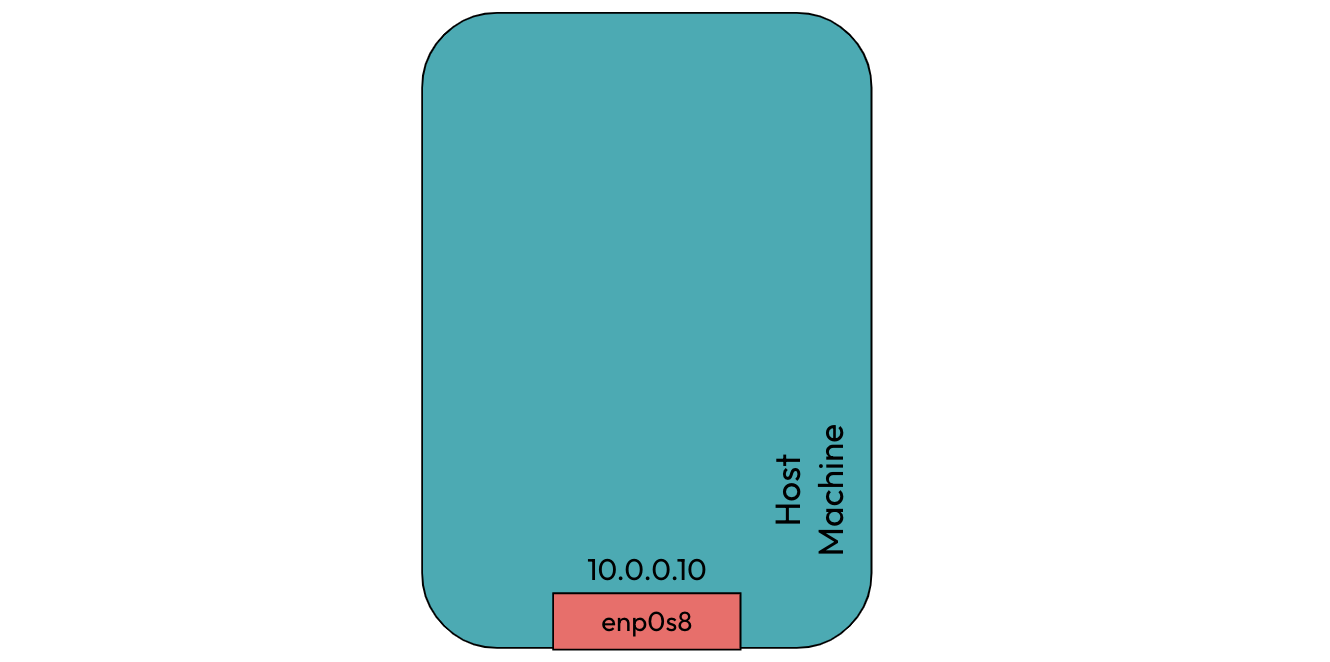
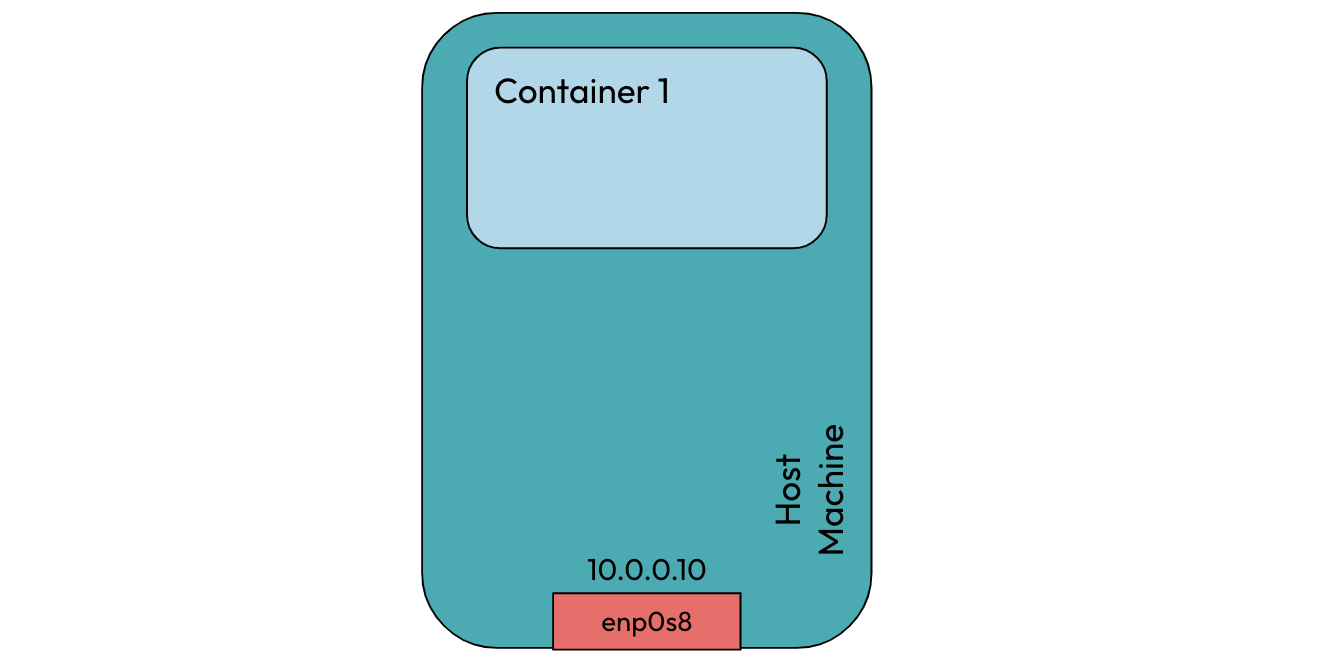
Initially, our host machine is configured with a network interface of IP address 10.0.0.10. The interface name and IP can be different for your case.
-
To create a network namespace, run
ip netns add container1
-
To list the network namespaces, run
ip netns. It will show container1 as a network namespace in the host. -
Now we need a way such that the host and container1 would be able to communicate with each other. We already learned that a veth pair can be used to enable communication between two namespaces. In our case, the two namespaces are the root namespace (i.e., the host) and the container1 namespace.
To create a veth pair, run
ip link add veth1 type veth peer name ceth1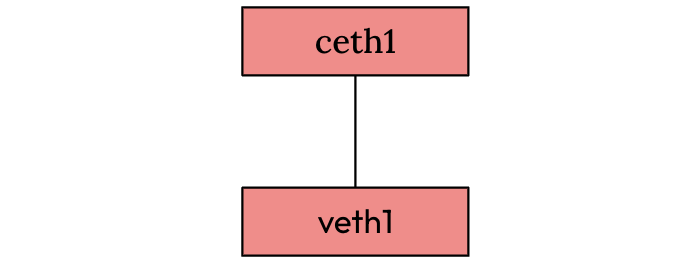
-
To see the veth pair created, run
ip link.You will see veth1 and ceth1 are created in the host, and they are in a down state.

-
Now we need to connect one end of the veth pair to container1 to allow communication between the host and container1. To set ceth1 inside container1, run
ip link set ceth1 netns container1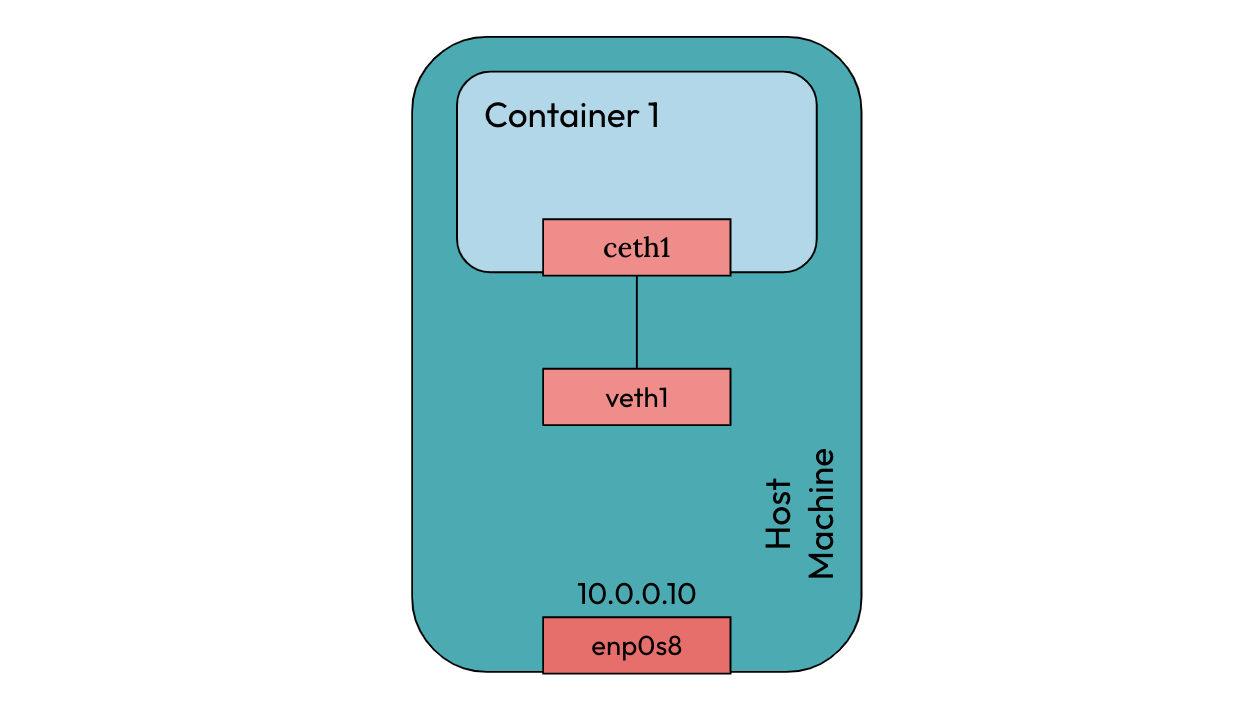
-
To list the interfaces inside container1
#ip netns exec <network namespace name> <command>
ip netns exec container1 ip link
Below you can see the ceth1 interface is set inside container1

-
By default, both ends of the veth pair were down. To enable
#To set veth1 up ip link set veth1 up #To set ceth1 up ip netns exec container1 ip link set ceth1 up -
To send packets to container1, we need to assign IP address to ceth1 interface inside container1.
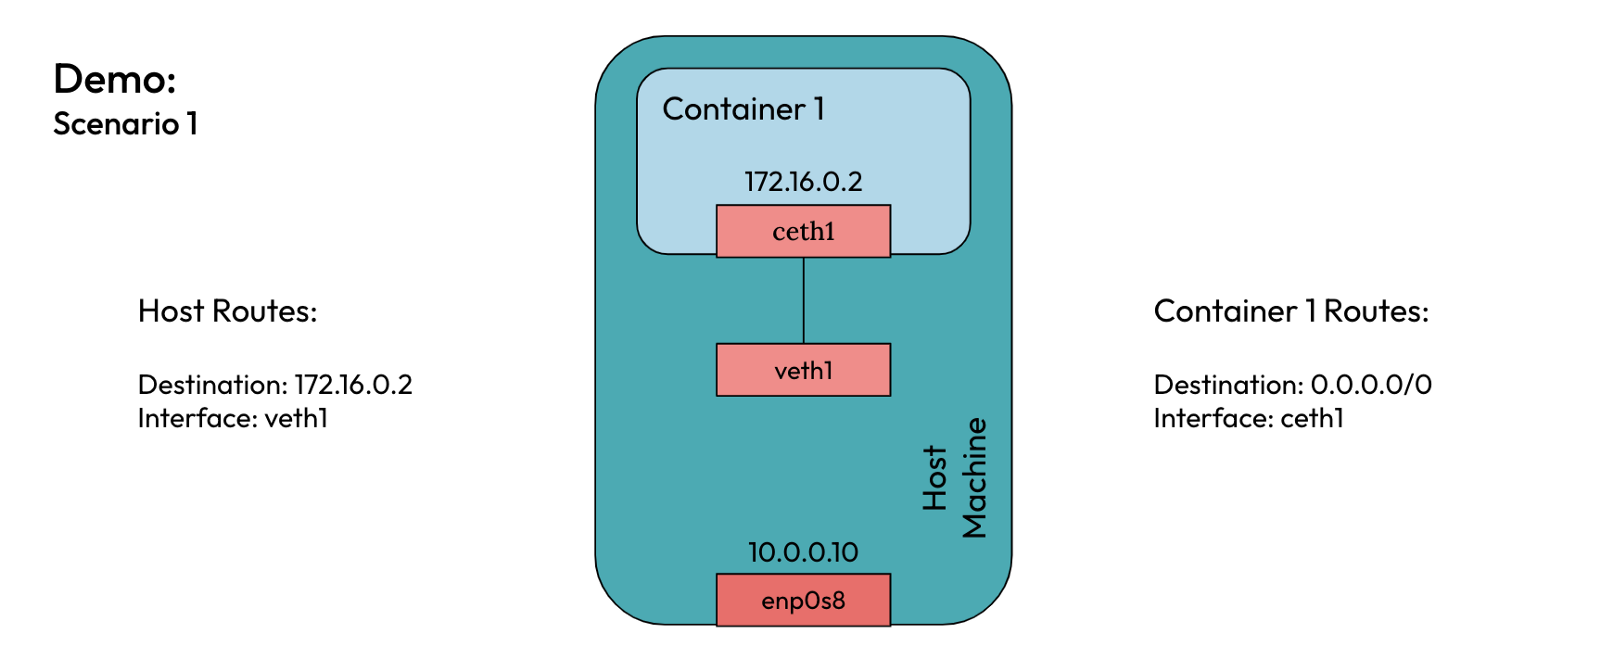
ip netns exec container1 ip addr add 172.16.0.2/24 dev ceth1You can check if the IP address was assigned to the ceth1 interface
ip netns exec container1 ip addrWhen you assigned an IP address to the ceth1 interface, a route was dynamically added inside the container1 namespace.
To check the routes inside container1,
ip netns exec container1 ip route This route means that any packet destined for 172.16.0.0/24 will be sent via the ceth1 interface.
 -
To ping container1 from the host, run
ping 172.16.0.2The ping hangs infinitely because there is no route in the host to send packets to container IP 172.16.0.2.
-
To send all packets destined for 172.16.0.0/24 via veth1 in the host, run
ip route add 172.16.0.0/24 dev veth1 -
Ping the container1 again from the host

The ping is still unsuccessful! Take a minute thought to understand why 🤔
Okay, if you got the reason why ping was unsuccessful, Congrats 🥂 👏, else I have the answer.
When we send a ping request from host IP 10.0.0.10, the container needs to send a response back to the host for the ping to be successful. Since
there is no route in container1 on how to send the response back to the host, it says the destination host is unreachable.
Let’s add a route inside container1. -
Set ceth1 as the default gateway for container1, run
ip netns exec container1 ip route add default via 172.16.0.2 dev ceth1 -
Now if you ping the container1 again
 The ping is successful 😃✌️
 -
Let’s try to ping the host from the container1
 voila 🎊😃, you made it.
The final networking setup for a single container running on a host machine
Conclusion
You just learned about network namespaces and about the elements that constitute container networking. You also set up the container networking from scratch using Linux commands. Both container1 and the host are able to send packets to each other.
In part 2, we will see how we can have multiple containers running on a single host communicate with each other.


